Thursday, July 10, 2014

Never Forget to Stretch!

"And as always fitness enthusiasts, do not forget to stretch on daily basis. Even if on days you did not workout." Says Ophir Health and Fitness Coach from Fitness Fixes.

"Over time our bodies naturally lose their flexibility, muscle shrinks and inflammation may occur. Stretching helps prevent these discomforts from happening. A basic stretch should be more than sufficient. Once you get better, you may progress to the next level." Here are a few to get you started:


DOUBLE KNEE TO CHEST STRETCH

Preparation:ImageProxy Never Forget to Stretch!
Initiate a thorough dynamic warm-up prior to starting this exercise; this engages the nervous system.
Movement :
  • Lie flat on the floor with the legs straight.
  • Lift both legs off of the floor and maintain triple flexion (at the hips, knees and ankles.)
  • Flatten out the back by initiating a posterior pelvic rotation (push the small of the back into the floor.)
  • With slow and controlled movement, grab the elevated legs into the chest (as shown.)
  • Hold for 30 seconds. Repeat 2-3 times.

HAMSTRING – LOWER, LYING
Preparation:ImageProxy 1 Never Forget to Stretch!Lie down on back and flex hip and knee to 90°.
Your lumbar spine should NOT move!
Movement:
  • Pull your thigh toward your chest and toe back toward your shin as far as you can control.
  • Slowly extend knee to ceiling until a slight stretch is felt.
  • The upper thigh must remain stationary without allowing the spine to move.
  • Hold for 20-30 seconds, repeat for 2-3 reps then switch legs.
  • Alternative technique: Following movement instructions, wrap towel around foot and slowly extend knee to ceiling until a slight stretch is felt.

HIP FLEXOR – LYING
Preparation:ImageProxy 2 Never Forget to Stretch!Lie on your side.
Bring lower leg forward into triple flexion and grasp the ankle of top leg as shown.
Movement:
  • Draw your belly button inward (activating the deep abdominal stabilising mechanism).
  • Tighten glutes and perform a posterior pelvic tilt.
  • Hold for 20-30 seconds, repeat for 2-3 reps.
  • Explore different hip positions to find specific ‘tight spots’.

ERECTOR SPINAE – CROSS LEG
Preparation:ImageProxy 3 Never Forget to Stretch!
Lie supine on ground with left leg straight out, and right leg bent and crossed over left side as shown.
Movement:
  • Draw your belly button inward.
  • Slowly use your left arm against your right crossed    leg to apply pressure to the point of tension.
  • Hold for 20-30 seconds, repeat for 2-3 reps.

BOW POSE
Preparation:ImageProxy 4 Never Forget to Stretch!
Start lying prone on the floor.
Movement:
  • Bend the legs and reach back to grab both feet.
  • Grab the feet from the outside.
  • Draw the shoulder blades together.
  • Arch the back while simultaneously pushing the feet up into the air so thighs come off the ground.
  • Be sure to hold onto the feet tightly to allow the raising of the feet to increase the spinal extension.
  • Hold this position for 3-5 deep breaths.

HIP FLEXOR – KNEELING
Preparation:ImageProxy 5 Never Forget to Stretch!Kneel on one knee as pictured.
Slightly abduct and internally rotate the back leg.
Movement:
  • Draw your belly button inward (activating the deep abdominal stabilising mechanism).
  • Tighten glutes and perform a posterior pelvic tilt.
  • Hold for 20-30 seconds, repeat for 2-3 reps.
  • Avoid arching low back!
  • Motion occurs predominately at the pelvis (posterior pelvic tilt), the back leg should not move.

KNEELING HIP FLEXOR
Preparation:ImageProxy 6 Never Forget to Stretch!Begin with one leg in a kneeling position and the other leg bent at a 90° angle.
Position the back leg in internal rotation.
Movement:
  • Draw your belly button inward.
  • Squeeze your buttocks while rotating pelvis posteriorly.
  • Slowly, move your body forward until a mild tension is achieved in the front of the hip being stretched.
  • Next raise your stretch side arm up and over to the opposite side, while maintaining pelvis position.
  • Hold side bend position and slowly rotate towards back leg.
  • Hold stretch for a minimum of 20 seconds each side.

POSTERIOR CAPSULE
Preparation:ImageProxy 7 Never Forget to Stretch!Start in anatomical position, with the shoulder blades retracted and depressed, and the transverse abdominus engaged (through a drawing-in maneuver.)
Movement:
  • Bring the arm across the chest so that the palm is facing the body (as shown).
  • With the opposing arm, apply LIGHT pressure until you feel a comfortable stretch in the posterior aspect of the shoulder.
  • Hold for 1min each side. Repeat 2-3 times.
  • Avoid the stretch if you feel ANY pain in the shoulder or arm.

PECTORAL – AGAINST WALL
Preparation:ImageProxy 8 Never Forget to Stretch!Stand against an object and form a 90/90° angle with your arms as depicted.
Movement:
  • Draw your belly button inward.
  • Slowly lean trunk forward from stationary arm until a slight stretch is felt in the anterior shoulder and pectoral region.
  • Hold for 20-30 seconds, repeat for 2-3 reps.


LAT – KNEELING or MODIFIED CHILD’S POSE
Preparation :ImageProxy 9 Never Forget to Stretch!
Position yourself in kneeling position as pictured.
Movement :
  • With one arm at a time, reach out, turn palm down (externally rotate the shoulder), push the lower back up (lumbar flexion).
  • When first resistance barrier is felt, hold for 20-30 seconds.
  • Repeat for 2-3 repetitions then switch arms.

Wednesday, July 2, 2014


Tabata Protocolvo2maxsymbol Tabata Protocol
  • spin biking
  • rowing machine
  • hitting a heavy bag
  • sprinting
  • jumping rope
  • squats
  • burpees
  • push ups
  • high knees run


Tabata Protocol - An earlier version of High Intensity Interval Training was based on a 1966 study by Professor Izumi Tabata initially involving Olympic Speedskaters. The formula suggests the athlete will perform a certain exercise for 20 seconds of work, at maximum performance,  followed by 10 seconds of rest, repeating the routine for 8 cycles (4 minutes.)
Professor Tabata used a mechanically braked cycle ergometer for his study but we are still able to apply this protocol to almost any exercise routine. A few popular examples include:

Personal Trainer, author and all around nice guy Ross Enamait from rosstraining.com writes, “It is important to note that changing the exercise used during the interval session may change the focus of the session. For example, working with a body weight exercise such as push ups or squats will shift the workout’s focus towards strength endurance.” What he is saying is, if your focus is more muscle and strength, then choose push ups, squats or add dumbbells to the Tabata Routine. This will develop your Anaerobic Threshold. If your focus is to develop more of an Aerobic Threshold then focus your routine on cardio based exercises ie: jump rope, sprinting, high knees run etc. When putting forth a maximal effort, you will be surprised at how intense 4 minutes of exercise will feel. These intervals are both taxing on the body and time efficient. Such intense work is excellent for those involved in sports such as boxing, mixed martial arts and wrestling.
As for the initial study, after 6 weeks of testing, Professor Tabata noted a 28% increase in anaerobic capacity along with a 14% increase in V02Max (maximal aerobic capacity.) These results were witnessed by physically fit athletes. 
Many tests are conducted on deconditioned subjects, which leads to results that are difficult to evaluate. Professor Tabata’s test was much more effective, as it produced a positive response on individuals who were already in shape. This form of training is also effective for fat loss. Intense interval work will raise the body’s metabolic rate long after the exercise session is completed known as the EPOC faze, Excess Post-Exercise Oxygen Consumption. Post workout fat loss is the end result. Many recent studies have confirmed that the powerful “after-effect” of interval training is more effective for fat loss than low-intensity, continuous exercise. Such research assumes that a true maximal effort is applied.
Now, in our bodies exist 2 threshold levels, Aerobic and Anaerobic. The Aerobic system uses oxygen to burn fuel, and the Anaerobic system does not. What happens is we start out by burning fuel with our Aerobic energy system. Once we go past the point where there is enough oxygen in our system to provide Aerobic energy to our muscles, Anaerobic system kicks in. Think of this as your SUPRA-AEROBIC zone. To get there, you need to get your heart rate up past what is typically referred to as the “Target Heart Rate Zone.” You will need to build up your endurance gradually. When you create an Oxygen Debt, your body has burned off all of the blood sugar/glycogen it has and now needs to replace all of that energy. This is done by the body’s natural state of burning fat. That is why high intensity training is so crucial for fat loss and also why the Tabata Protocol is considered to be one of the best fat burning workouts. Basically, if you work hard enough, even for just four minutes, you really should be able to get into decent cardiovascular shape. That said, based on the intensity of a Tabata workout, the average non-exerciser should be very careful with this type of training. It could potentially be dangerous for a beginner to be working this hard. In my opinion, before people even attempt Tabata Protocol they should have a decent level of fitness.
So, four minutes to fitness? Maybe not, but clearly, based on the evidence, short-burst, high-intensity training is the real deal and adapting Tabata-style training to fit your workouts is without a doubt a very effective approach you can employ to help you achieve your goals.
To calculate your VO2 Max, click HERE then visit back to see how you scored.

Sunday, June 29, 2014


Spicy Roasted Cauliflower


Cauliflower549x305 Roasted Cauliflower
Roasted cauliflower? Been there, done that. But roasting a whole head of a cauliflower? Now we’ve got your attention. This cauliflower recipe in a spicy yogurt marinade and roasting it at a high temperature is sure to please, even the non veggie eaters will be speechless. The result is an amazingly delicious dish that’s as dramatic in presentation as it is easy in preparation. Serve it with a big green salad (we suggest fresh squeezed lemon and olive oil for the dressing) for an easy weeknight supper or your next “the vegetarians are coming to dinner” party.

INGREDIENTS
  • 1 tablespoon oil
  • 1 head cauliflower
  • 1½ cups plain Greek yogurt (Fage, Chobani)
  • 1 lemon, zest and juiced
  • 2 tablespoons chile powder
  • 1 tablespoon cumin
  • 1 tablespoon garlic powder
  • 1 teaspoon curry powder
  • 2 teaspoons kosher salt
  • 1 teaspoon black pepper

COOKING INSTRUCTIONS
  1. Preheat the oven to 400° and lightly grease a small baking sheet with oil. Set aside.
  2. Trim the base of the cauliflower to remove any green leaves and the stem.
  3. In a medium bowl, combine the yogurt with the lemon zest and juice, chile powder, cumin, garlic powder, curry powder, salt and pepper.
  4. Dunk the cauliflower into the bowl and use a brush or your hands to smear the marinade evenly over its surface. (Excess marinade can be stored in the refrigerator in an airtight container for up to three days and used with meat, fish or other veggies.)
  5. Place the cauliflower on the prepared baking sheet and roast until the surface is dry and lightly browned, 30 to 40 minutes. The marinade will make a crust on the surface of the cauliflower.
  6. Let the cauliflower cool for 10 minutes before cutting it into wedges and serving alongside a big green salad.
  7. ENJOY!!

Saturday, June 21, 2014

Hello everyone!
Welcome back to the Fitness Fixes Blog. This week I wanted to share with everyone a wonderful recipe many countries have learned to adopt called, Shakshuka. A low calorie, delicious, nutritious meal that can be prepared by all types of cooking levels. So strap on your aprons kids. We're going in!!!


Shakshuka


Shakshuka Side View 2 640x480 Shakshuka
Shakshuka
SHAKSHUKA: A middle eastern treat. Can be eaten for breakfast, lunch, or dinner. For breakfast, serve with warm crusty bread or pita that can be dipped into the sauce (gluten- free breads optional). For dinner, serve with a green side salad for a light, easy and nutritious meal.
INGREDIENTS
  • 1 tbsp olive oil
  • 1/2 medium brown or white onion, peeled and diced
  • 2 clove garlic, minced
  • 1 medium green bell pepper, chopped (optional)
  • 4 cups ripe diced tomatoes, or 2 cans (14 oz. each low sodium) diced tomatoes
  • 2 tbsp tomato paste (low sodium)
  • 1 tsp chili powder (mild)
  • 1 tsp cumin
  • 2 tsp paprika
  • 1 tsp cayenne pepper (or more to taste– spicy!)
  • 1 tsp raw cane sugar (optional, to taste)
  • Salt and pepper to taste
  • 4-6 eggs
  • 2-3 leaves of  fresh chopped basil (optional, for garnish)
COOKING INSTRUCTIONS
  1. In a deep, large skillet or sauté pan on medium heat, slowly warm olive oil in the pan.
  2. Add chopped onion, sauté for a few minutes until the onion begins to soften and become transparent. Add garlic and continue to sauté till mixture is fragrant. About 4-5 minutes.
  3. Add the bell pepper, sauté for 5-7 minutes over medium until softened.
  4. Add tomatoes and tomato paste to pan, stir till blended.
  5. Add spices and sugar, stir well, and allow mixture to simmer over medium heat for 5-7 minutes till it starts to reduce. At this point, you can taste the mixture and spice it according to your flavor profile. Add salt and pepper to taste, more sugar for a sweeter sauce, or more cayenne pepper for a spicier shakshuka (careful with the cayenne…it is spicy!).
  6. I prefer to crack the eggs, one at a time, in a seperate bowl to minimize broken egg shells in the food. Then individually pouring them directly over the tomato mixture, making sure to space them evenly over the sauce. Properly place 4-5 eggs around the outer edge and 1 in the center. The eggs will cook “over easy” style on top of the tomato sauce. Some people prefer their shakshuka eggs more runny. If this is your preference, let the sauce reduce for a few minutes before adding the eggs on top– then, cover the pan and cook the eggs to taste.
  7. Cover the pan. Allow mixture to simmer for 10-15 minutes, or until the eggs are fully cooked or slightly runny (depending on preference) and the sauce has slightly reduced. Keep an eye on the skillet to make sure that the sauce doesn’t reduce too much, which will stick to the pan and can lead to burning and impact the taste.
  8. Garnish with fresh basil, if desired.
  9. ENJOY!!!


Prep Time: 10 Minutes
Total Time: 30 Minutes
Servings: 4-6 Adults

Wednesday, June 18, 2014

An Oldie but Goodie

1101090817 400 An Oldie but GoodieThis was Time Magazine’s Cover Photo from a 2009 article written by John Cloud. One of my favorite, most controversial fitness covers I’ve seen in years. Brought to me by one of  my clients, man what a good article. It’s a message that has gotten louder over the last few years: exercise doesn't work for weight loss. There was The Myth about Exercise featuring a photo of a woman pounding a treadmill, her eyes focused on a yummy looking cupcake. It symbolized the story’s thrust: research suggesting exercise won’t help weight loss because it makes us eat more to make up for the calories we burn. It’s a message repeated recently in the new book Big Fat Lies in which author David Gillespie – a lawyer – describes exercise for weight loss as ‘pointless’. But is it really true? No, says David Driscoll – not a lawyer, but an exercise physiologist and sports dietitian – who thinks that exercise deniers, like climate change deniers, don’t tell the whole story – they cherry-pick the evidence that suits their message instead. It’s not hard to find research showing exercise does shift weight, especially when it’s combined with a leaner diet, says Driscoll, a member of Sports Dietitians Australia. But when studies do find little or no weight loss benefit from exercise, this may have more to do with behavior than biology. 
 “Can Exercise make us eat more? – YES – what’s not clear is whether this is because our bodies are demanding the extra fuel or because we think we deserve it,” he says. “In studies where people do consume more calories after exercise no one’s asked them if it’s because of real hunger or because they feel they need a reward for working out. We need to establish this – it’s well-known that eating isn’t always related to hunger. When research finds little weight loss from exercise, Driscoll believes it’s also important to look at how much fat is shed, not just weight. In some studies people may not lose much weight but they may lose fat and gain muscle.
As for a shining example that diet and exercise do work, there’s the U.S. a project tracking the progress of 10,000 people who’ve lost an average of 65 lbs and kept it off for over five years – and guess what? Ninety eight per cent of these successful weight loss losers report that they changed their diet in some way to lose weight – and 94 per cent increased their physical activity.
So is the exercise-is-useless message a dangerous one?
It’s irresponsible, but it’s also a message that some people want to hear and it appeals to people who don’t like exercise. But I don’t think it will make people who are already exercising stop. Driscoll says – “And in the unlikely event that exercise turned out not to work and actually caused weight gain, the health benefits of physical activity are so great they’d offset the problem of a little extra weight gain.”

Monday, June 16, 2014

Here's a little workout to get you guys started! Enjoy! and dont forget to stretch!!!!

CORE AND COORDINATION

This sequence will focus on your core muscles and your ability to complete multi-plane movements effectively. Your core muscle include all the muscles used to move your extremities, 29 to be exact, not just your abdominals, as most people believe. We have included some endurance, agility and balance exercises.

Rest 30-60 sec in between each exercise!
COMPLETE THE SEQUENCE 3 TIMES. HERE WE GO!!


JUMPING JACKS – WITH CROSS OVER
Reps : 100
  • Start with one foot behind the other, knees bent, and arms out to the side of body.
  • Hop feet wide while simultaneously swinging arms overhead.
  • Hop the feet back to starting position with the other foot forward and arms swinging back to starting position.
  • Try to time yourself.
IMG 0130 Prgm #1 May 25 31, 2014
IMG 0131 Prgm #1 May 25 31, 2014
RUSSIAN TWIST – KETTLEBELL OR BALL
Reps : 50
  • Hold Kettlebell or BALL in a seated, reclining position with feet up or down. If you don’t have a kettlebell or ball just clasp your hands together in a fist.
  • Counter-rotate the lower and upper body while flipping the bell from side to side as shown.


IMG 0265 Prgm #1 May 25 31, 2014
IMG 0266 Prgm #1 May 25 31, 2014
ICE SKATERS
Reps :50
  • Make sure to land lightly on each foot. Take a wide hop to maximize the effectiveness of the move.
  • Perform a crossover step and land on an ice skater hop on the outside leg, while swinging opposite arm toward load leg (as shown).
  • Transfer the momentum back to a crossover step in the opposite direction and put weight to the other side.
IMG 9781 Prgm #1 May 25 31, 2014
IMG 9782 Prgm #1 May 25 31, 2014
BASIC SQUAT
Reps : 30
  • Stand tall looking straight ahead.
  • Initiate a squat with a knee bend.
  • As the knees bend past 10°, push the hips back and keep bending the knees.
  • Only descend into the squat half way as illustrated.
  • Squat back up and repeat pattern.
IMG 6943 Prgm #1 May 25 31, 2014
IMG 6944 Prgm #1 May 25 31, 2014
IRON CROSS
Reps : 40
  • Lie on the floor with the arms out to the side, palms facing up.
  • Ensure that the shoulders remain on the floor.
  • Start the movement by lifting one straight leg up and over towards the opposite hand, while maintaining a 90 degree angle throughout the move.
  • The movement should be fluid and SLOW, and rotation should occur through the entire lower back.
IMG 9786 Prgm #1 May 25 31, 2014
IMG 9787 Prgm #1 May 25 31, 2014
CRUNCHES
Reps : 50Sets :
  • Lie face up on the ground with knees bent, feet flat on the floor and hands lightly supporting the head.
  • Roll your upper body off the ground up to a crunch, squeezing the abdominal muscles and holding for approx 3 seconds at the top of the contraction.
  • Lower slowly, one vertebrae at a time and repeat.
IMG 9022 Prgm #1 May 25 31, 2014
IMG 9023 Prgm #1 May 25 31, 2014
BUTT KICK (Advanced Exercise)
Reps : 20
  • Start in a squat position.
  • Explosively extend the legs, simultaneously swinging the arms overhead.
  • Once in the air, try to kick the heels to the butt.
  • Land on the toes, and then heels.
  • Absorb force with at hips, knees, and ankles bending the knees as you land.
IMG 8348 Prgm #1 May 25 31, 2014
IMG 8347 Prgm #1 May 25 31, 2014
PUSH-UP ONE FOOT
Reps : 20
ALMOST THERE!!
  • Begin in a push-up position.
  • Slightly lift one foot off the floor.
  • Ensure the body line is tall and long
  • Perform a push-up by lowering your body slowly toward the floor, leading with your chest. The last part of your body down should be your hip and glute area.
 Prgm #1 May 25 31, 2014
 Prgm #1 May 25 31, 2014
REVERSE PLANK 
Reps : 60 seconds
  • Place your hands behind you on the mat or floor with your fingers pointing forward toward your Glutes/Buttocks
  • Place both feet in front of you flat on the floor hip width apart.
  • Lift your torso from the floor to weight bear on both hands and feet evenly.
  • Bring your torso as close as you can to a straight line from your knees to your shoulders.
  • If you would like to challenge yourself, lift one foot off the floor.
  • Hold the position, then return to the starting position and repeat
IMG 3003 Prgm #1 May 25 31, 2014
IMG 3004 Prgm #1 May 25 31, 2014
COBRA – FLOOR
Reps :20
  • Laying face down on the floor have arms beside your hips.
  • Activate core muscles by drawing in navel towards spine and squeezing glutes.
  • With core and glutes activated, lift chest off the floor, lift arms up and back towards the hips rotating thumbs towards the ceiling.
  • Pause for 3 sec at the top of the lift then return to starting position; at all times keeping the chin tucked into the chest.
  • Return to the starting position and repeat.
  • Don’t arch the back to lift the chest off the floor. Only lift to where you are comfortable – no lower back pain should be felt. If so stop.
IMG 8973 Prgm #1 May 25 31, 2014
IMG 8974 Prgm #1 May 25 31, 2014

Personal Thought

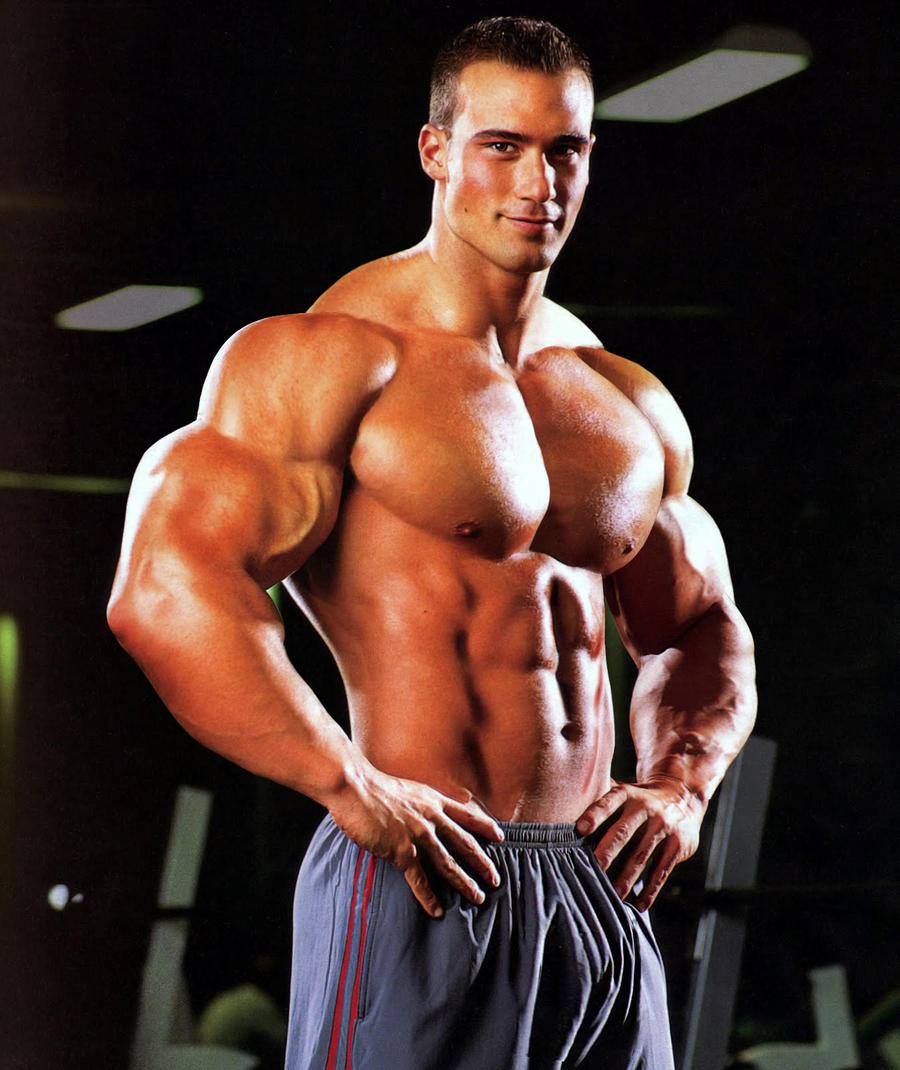
Being a personal trainer for almost 11 years now I have heard my share of questions. I’m always being asked “What’s the best exercise for this?” or “What can I do to get rid of that?”  or mybodybuilder 21 by stonepiler d478dwu Personal Thought own personal favorite “How can I look like this?”  While holding up a picture of this guy on your right. Obviously if you started training your body from a young age, whether it be from playing sports, lifting weights, surfing, dancing what have you, your potential for growth and more visible muscular churn increases. But if you’ve never lifted a finger, the potential is much less. In my personal opinion and own personal experience what I have noticed is, everyday folks who start weight lifting at a much later age do have a harder time reaching their fitness goals. A few factors may affect this:
Mature Muscles – Our muscle tissue naturally shrinks as we age. Making us weaker and thus burning less calories on a daily basis. This slows down weight loss. However, it seems that wear and tear on the muscles, combined with hormonal changes, may make the body less efficient at replenishing muscle cells after they are damaged. It is believed that hormonal changes associated with aging in both men and women may contribute to the muscle loss that slows metabolism.
Physical Strain - As we get older, we may not have the ability to participate in activities we once enjoyed. For example, you may need to trade running for walking, weight lifting for pilates or yoga, and sports (tennis, basketball) for swimming. Now, it is true that lower-impact activities are still effective, but you may need to do them more often, or for longer periods, to achieve the same results. This does not appeal to those that consider working out a chore and not a way of life. Sometimes, older individuals may have health limitations that reduce or eliminate their ability to be active. Others may assume they are too old for exercise, and avoid activity all together.
Not Seeing Results - You can’t find the time to go regularly so every session feels like the first one. Finding two or three hours a week to exercise doesn’t seem like a problem, but if you don’t enjoy going, it is easy to schedule another appointment. Fitness will become the last item on your priorities list and once again you find yourself not going to the gym or exercising at home. By the time you do end up going, you feel like the new kid on the block every single time.
Limited Abilities - Whether it’s arthritis or a sore knee, a frozen shoulder or osteoporosis, many older adults believe that they’re “too old” or “too injured” to exercise. While some injuries respond best to total rest, most simply require you to reevaluate your exercise routine with help from your doctor or physical therapist or professional trainer. Limited mobility doesn’t mean you can’t exercise. Start slow and gradually increase your activity level. Start with an activity you enjoy, go at your own pace, and keep your goals manageable. Accomplishing even the smallest fitness goals will help you gain body confidence and keep you motivated. However, an injury doesn’t mean your mental and emotional health is doomed. 

Let’s Shed Some Light on the Topic

So what does all this really mean? Well, to me, it just sounds like a bunch of lame excuses not to get off of your behind and doing something that you normally would not do on your own. The truth is, everyone is absolutely capable of doing it all. There are no age restriction, there are no health restrictions, time restrictions etc…All that we lack is the will! Everyday we hear, read and see wonderful people overcome outstanding obstacles and conquer impossible feats. So can you!
Intensity  To us, means great energy, strength, concentration, thought or feeling during an activity. Most just simply lack this one attribute. Yet not many say it and the rest won’t admit to it.
Workout Intensity - Exercise intensity is a subjective measure of how hard physical activity feels to you while you’re doing it — your rate of perceived exertion or RPE. 
So, how hard should you be exercising? For most healthy adults, the Department of Health and Human Services recommends monitoring your heart rate as an exercise guideline. Your heart rate offers a more objective look at exercise intensity. In general, the higher your heart rate during physical activity, the higher the exercise intensity. Studies show that your perceived exertion correlates well with your heart rate. So if you think you’re working hard, your heart rate is likely elevated.

Children and Adolescents

Get at least 1 hour or more a day of physical activity in age-appropriate activities. Spend most of that hour in moderate- or vigorous–intensity aerobic activities. Make sure to get vigorous-intensity aerobic activity on at least three days of the week, and include muscle-strengthening and bone strengthening activities on at least three days of the week.

Healthy Adults

Get a minimum of 2-1/2 hours per week of moderate-intensity aerobic activity, or a minimum of 1-1/4 hours per week of vigorous-intensity aerobic activity, or a combination of the two. That could mean a brisk walk for 30 minutes a day, five days a week; a high-intensity spinning class one day for 45 minutes, plus a half hour jog another day; or some other combination of moderate and vigorous activity. Doubling the amount of activity (5 hours moderate- or 2-1/2 hours vigorous-intensity aerobic activity) provides even more health benefits. Adults should also aim to do muscle-strengthening activities at least two days a week.

Older Adults

Healthy older adults should follow the guidelines for healthy adults. Older adults who cannot meet the guidelines for healthy adults due to a risk factor, should be as physically active as their abilities and conditions allow. People who have chronic conditions such as arthritis and type 2 diabetes should talk to a healthcare provider about the amount and type of activity that is best. Physical activity can help people manage chronic conditions, as long as the activities they choose match their fitness level and abilities. Even just an hour a week of activity has health benefits. Older adults who are at risk of falling should include activities that promote balance.

All that is left now is, consistency. When working out under these conditions and maintaining a healthy lifestyle and diet, results should be visible within the first month of dedication to changing your outlook on the whole “being fit gig.” It takes time, patience and a lot of mental toughness to overcome these daily challenges. Make sure you do things progressively. Leave room for growth and more dynamic movement as you get better with each exercise you tackle.